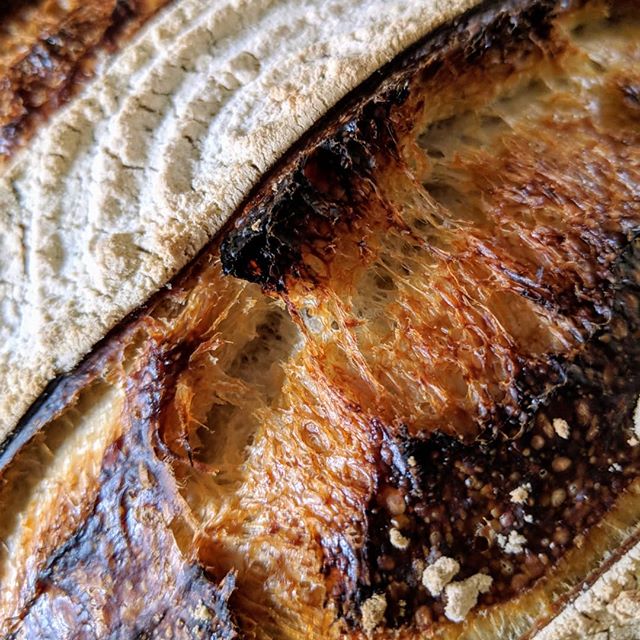

The January 2010 Daring Bakers’ challenge was hosted by Lauren of Celiac Teen. Lauren chose Gluten-Free Graham Wafers and Nanaimo Bars as the challenge for the month. The sources she based her recipe on are 101 Cookbooks and www.nanaimo.ca.
The January challenge had a slight twist to it, we were asked to try out gluten free baking!

Gluten free Graham Crackers
The challenge was to make our own Graham Crackers and then as a second part to the challenge, although not a mandatory part, to use the Graham Crackers to make Nanaimo Bars.
Now, I've heard of Graham Crackers, although have never tried them, but sort of understood what they would be like, but Nanaimo Bars was new to me.

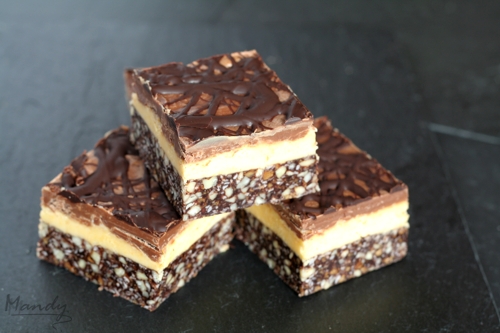
My version: Topped with milk choc, then drizzled with 70% choc
Its origin is from Canada, Nanaimo City, to be precise. I guess it's something of a home comfort munchie food, the sort where the measurements aren't too important and you know it will be gobbled up by kids in no time. I like having these kinds of recipes, you never know when you need to whip up something easy but tasty, and these definitely fit the bill.

Cooling crackers
Despite being warned that the Graham Cracker dough would be rather sticky in gluten free form, I found I didn't have any problems with it at all, was just the same as any other rolled out cookie dough. Some other DBers mentioned their dough also being very wet, but I found mine to be a little on the dry side, I had to give it a good kneeding to keep it together 'cause it was a little crumbly after chilling in the fridge.
It could be that I used potato starch in place of the sorghum flour, I couldn't find sorghum anywhere and someone had mentioned that it could be substituted with millet flour or potato starch. Pity I didn't read through the tips Lauren had given us as she had mentioned that the sorghum could be replaced with brown rice flour. Doh! Anyway.

I also found the baked crackers left a slightly chalky feel in my mouth, my husband said the same thing, so I'm wondering if that was also due to the potato starch. Either way, they were still tasty.
We were given the option to add other flavours to the Nanaimo Bars but I decided that I wanted to try the original recipe, like I said, I'd never heard of these before and so didn't know what to expect at all. To be honest, the ingredient list didn't excite me all that much to begin with.
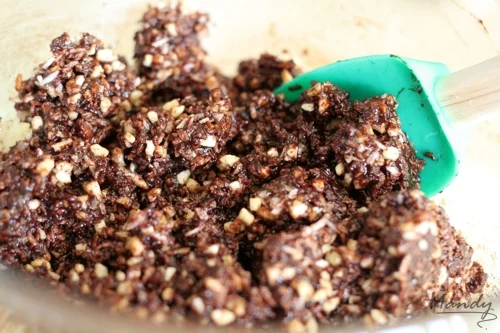
Mixing the ingredients for the bottom layer
I was still sceptical about all the rave reports when I had a taste of the mixture for the bottom layer, it was bitter with cocoa and not too exciting. But I tell you, once it was all put together and I took a bite of the completed bar, I understood why there were so many good reports coming from the other DBers.

Spreading the buttercream
It's very rich and very sweet, but oh so good. You just need a 2" square to sort out any craving you've had for something sweet. The coconut is fantastic, I loved the smooth buttercream layer, and the texture from the bottom layer is just fantastic with bits of nuts and Graham Cracker crumbs giving the bar a bit of a crunch and bite in contrast to the silky buttercream and chocolate on top.
These bars were earmarked from the start for my neighbour's daughter who had recently found out she has Celiacs and I'm happy to say that she loved them!
Now that I know what this bar offers, I can certainly see myself making other variations like some of the other DBers did, adding Rice Krispies or oats, using hazelnuts instead of almonds, making the buttercream layer with peanut butter or coffee. There's a lot that can be done with this bar!
Graham Crackers (Gluten Free)
Ingredients
1 cup (138g / 4.9oz) Sweet Rice Flour (also known as glutinous rice flour)
3/4 cup (100g / 3.5oz) Tapioca Starch/Flour
1/2 cup (65g / 2.3oz) Sorghum Flour
1 cup (200g / 7.1oz) Dark Brown Sugar, lightly packed
1 tsp (5ml) Baking Soda
3/4 tsp (4ml) Kosher Salt
7 Tbsp (100g / 3 ½oz) Unsalted Butter, cut into 1-inch cubes and frozen
1/3 cup (80ml) Honey, mild-flavoured
5 Tbsp (75ml) Whole Milk
2 Tbsp (30ml) Pure Vanilla Extract
Method
- In the bowl of a food processor fitted with a steel blade, combine the flours, brown sugar, baking soda, and salt
- Pulse on low to incorporate
- Add the butter and pulse on and off, until the mixture is the consistency of a coarse meal
- If making by hand, combine aforementioned dry ingredients with a whisk, then cut in butter until you have a coarse meal. No chunks of butter should be visible
- In a small bowl or liquid measuring cup, whisk together the honey, milk and vanilla
- Add to the flour mixture until the dough barely comes together. It will be very soft and sticky
- Turn the dough onto a surface well-floured with sweet rice flour and pat the dough into a rectangle about 1 inch thick
- Wrap in plastic and chill until firm, about 2 hours, or overnight
- Divide the dough in half and return one half to the refrigerator
- Sift an even layer of sweet rice flour onto the work surface and roll the dough into a long rectangle, about 1/8 inch thick. The dough will be quite sticky, so flour as necessary
- Cut into 4 by 4 inch squares
- Gather the scraps together and set aside
- Place wafers on one or two parchment-lined baking sheets
- Chill until firm, about 30 to 45 minutes
- Repeat with the second batch of dough
- Adjust the rack to the upper and lower positions and preheat oven to 350°F / 180°C (160°C Fan Assisted)
- Gather the scraps together into a ball, chill until firm, and reroll
- Dust the surface with more sweet rice flour and roll out the dough to get a couple more wafers
- Prick the wafers with toothpick or fork, not all the way through, in two or more rows
- Bake for 15-25 minutes, until browned and slightly firm to the touch, rotating sheets halfway through to ensure even baking. The starting location of each sheet may determine its required time. The ones that started on the bottom browned faster
Nanaimo Bars
Ingredients
Bottom Layer
1/2 cup (115g / 4oz) Unsalted Butter
1/4 cup (50g / 1.8oz) Granulated Sugar
5 Tbsp (75ml) Unsweetened Cocoa
1 Large Egg, beaten
1 1/4 cups (160g / 5.6oz) Gluten Free Graham Wafer Crumbs (see previous recipe)
1/2 cup (55g / 1.9oz) Almonds, any type, finely chopped
1 cup (130g / 4.5oz) Coconut, shredded, sweetened or unsweetened
Middle Layer
1/2 cup (115g / 4oz) Unsalted Butter
2 Tbsp + 2 tsp (40ml) Heavy Cream
2 Tbsp (30ml) Vanilla Custard Powder (such as Bird’s or UltraMel)
2 cups (254g / 8.9oz) Icing Sugar
Top Layer
4oz / 115g Semi-Sweet Chocolate
2 Tbsp (28g / 1oz) Unsalted Butter
Method
- For bottom Layer:
- Melt unsalted butter, sugar and cocoa in top of a double boiler
- Add egg and stir to cook and thicken
- Tip: I used a whisk and had to stir quite vigirously to get it to all mix together into a smooth mixture
- Remove from heat
- Stir in crumbs, nuts and coconut
- Press firmly into an ungreased 8 x 8 inch pan
- Tip: Whenever I make bars, I put parchment paper in the pan and have the ends sticking out, this makes it easy to lift the whole thing out of the dish for easier cutting
- Tip: If the bottom layer is still warm, chill in the fridge before adding the buttercream
- For Middle Layer:
- Cream butter, cream, custard powder, and icing sugar together well
- Beat until light in colour
- Spread over bottom layer
- For Top Layer:
- Melt chocolate and unsalted butter over low heat
- Cool
- Once cool, pour over middle layer and chill
- Tip: For easy cutting, chill in the fridge for about an hour

Delicious Nanaimo Bars
Lauren, thanks so much for this challenge. It was an easy but delicious recipe to bring in the new year and I also learnt a lot about gluten free baking :)
Other Tips
These bars freeze very well, so don’t be afraid to pop some into the freezer.
The Graham wafers may be kept in an airtight container for up to 2 weeks.
If making the Graham Crackers with wheat, replace the gluten-free flours (tapioca starch, sweet rice flour, and sorghum flour) with 2 ½ cups plus 2 tbsp of all-purpose wheat flour, or wheat pastry flour. Watch the wheat-based graham wafers very closely in the oven, as they bake faster than the gluten-free ones, sometimes only 12 minutes.
For the Nanaimo Bars, if making with wheat, replace the gluten-free Graham wafer crumbs with equal parts wheat Graham wafer crumbs!
Glutinous rice flour does not contain any gluten, as it is made from a type of rice called glutinous (or sweet rice.
The Graham wafer dough is very sticky. Make sure you are flouring (with sweet rice flour) well, or the dough will be difficult to remove from the surface you roll it out on. Also be sure to keep it cold. You do not want the butter to melt.
Lauren chose these flours because of their availability. Tapioca starch/flour and sweet rice flour can often be found in Asian grocery stores, or in the Asian section of you grocery store. Sorghum can be slightly more difficult to find, but it can be replaced with brown rice flour, millet flour or other alternatives.
In the Nanaimo Bars, it is very important that the chocolate be cool but still a liquid, otherwise the buttercream layer will melt, and it will mix with the chocolate, being difficult to spread. Allow the chocolate mixture to come to room temperature but not solidify before spreading the top layer on.
If you can't find custard powder, replace it with 1Tbsp cornstarch & 1tsp Vanilla Extract (and a few drops of yellow food colouring if you want a yellow layer)
I used 200g milk chocolate for the top layer, then drizzled about 50g 70% dark chocolate over it