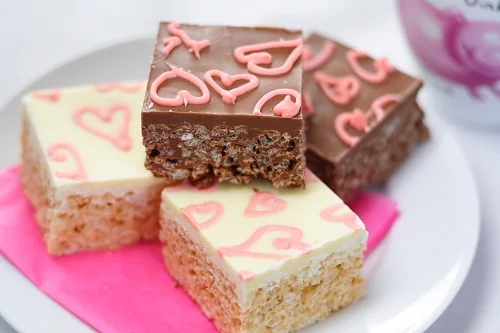
Treats for your Sweets
I don't care how old you are, Rice Krispie treats are ALWAYS good! And although I'm not always a chocolate eater, I'll never say no to a bowl of Coco Pops.
Then I came across these fantastic treats at our local store (the same store that make fantastic Rocky Road bars which inspired my Halloween version). They make Rice Krispie treats covered with a layer of white chocolate. They also do a Coco Pop version made with Mars Bars. Yes please! MORE! GIVE ME MORE!

I remember when I first saw them (followed by quickly purchasing & eating them!) I thought they'd be quite cute with other coloured chocolate patterns drizzled on top, for instance, hearts or silly cute messages for Valentine's Day.

And so, that's exactly what I decided to do. Whether it's for your kid's lunchbox or something simple for your Other Half, you can't go wrong with Treats for your Sweets.

Strawberry Pop Treats
I took it one step further and went down to the South African store to buy a box of Kellogg's Strawberry Pops (as they don't have that cereal here in Ireland) and gave them the same treatment as the Rice Krispie treats but made them into hearts instead. Awwwww, cuuuuuute! :P

If you can't get Strawberry Pops but still want to have the cute pink Krispie treats, you could always add food colouring to the melted marshmallow, it doesn't even have to be pink.

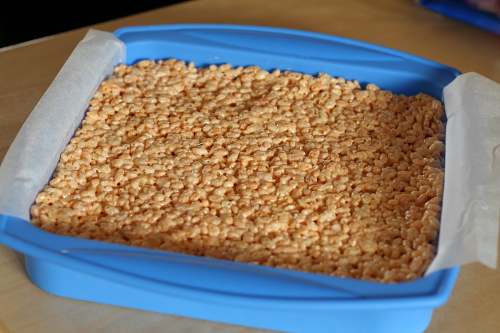
Ready to be cut
They're easy to make, although rather sticky, and taste fantastic, they also don't cost an arm and a leg, so if you're like my hubby who doesn't enjoy the notion of the Hallmark enforced spend-a-fortune-for-Valentine's-cause-we-say-so, these are a win. Something simple to say "I love you" but without the inflated price tag, 'cause really, do you actually need another "You're my one and only love of my life want to be with you forever and ever and ever" mug in your cupboard? :P

Rice Krispie treats with white chocolate
White Chocolate Rice Krispie / Strawberry Pop Treats
Ingredients
45g Unsalted Butter or Margarine
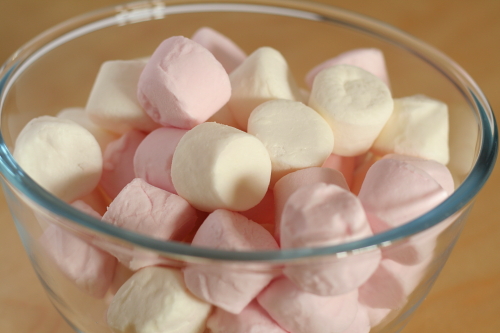
280g Marshmallows
6 cups Rice Krispies or Strawberry Pops
400g White Chocolate
Powder or Paste Food Colour
Method
- Butter a 9"x9" dish or line with parchment paper
- Tip: I prefer using parchment as it's easier to remove the treats by lifting them out by the parchment overhang which makes it easier to cut into portions once it's out of the dish
- Over a low heat in a saucepan, melt the butter or margarine
- Add the marshmallows and stir until melted
- Optional: Stir in gel, powder or paste food colouring until you get your desired shade
- Remove from heat
- In a large bowl, combine the Rice Krispies or Strawberry Pops with the melted marshmallow mixture
- Stir until thoroughly combined
- Tip: This is the really sticky part and if you're in a cooler climate it's best to do this with your bowl over simmering water so that the marshmallow stays warm, alternatively, melt the marshmallows in a large pot which you can then add the Rice Krispies to
- Press into your prepared dish
- Tip: I found it best to use a small piece of buttered parchment paper to spread and press the mixture
- Leave to set while you prepare the chocolate
- Melt the chocolate in a heat resistant bowl over simmering water
- Reserve a small amount of the melted chocolate for tinting and keep warm over simmering water
- Pour the chocolate over the Rice Krispies and tilt the dish a little in each direction so that the chocolate moves around and coats the top evenly or spread with a spatula
- Allow the chocolate to set
- Tip: If you want the coloured chocolate to sit on top of the white chocolate, then allow to set until firm. If you want the coloured chocolate to sink a little bit into the white chocolate so it's a bit more flush with the surface, then leave to set until it's completely cool but the consistency is like thick magma
- Stir powdered or paste food colour into the reserved chocolate
- Tip: Make sure you don't use any water based colouring as the chocolate will seize
- Pour the tinted chocolate into a piping bag
- Tip: Or you can use a plastic Ziploc bag or similar with a small corner snipped off
- Pipe patterns or words onto the surface of the chocolate
- Allow to set completely
- Tip: If you chill it in the fridge, allow it to sit out at room temperature for 10-20mins before cutting
- Cut into squares or shapes with a sharp blade
- Tip: To do the hearts, I pushed a cookie cutter through the chocolate layer then used a sharp knife to cut through the Krispies layer using the cookie cutter as a guide

Mars Bar Coco Pop treats
Mars Bar Coco Pop Treats
Ingredients
45g Unsalted Butter or Margarine
6 Mars Bars (58g each), chopped up
6 cups Coco Pops
400g Milk Chocolate
30g-60g White Chocolate
Powder or Paste Food Colour
Method
- Butter a 9"x9" dish or line with parchment paper
- Tip: I prefer using parchment as it's easier to remove the treats by lifting them out by the parchment overhang which makes it easier to cut into portions once it's out of the dish
- Over a low heat in a saucepan, melt the butter or margarine
- Add the pieces of Mars Bar and stir until just melted
- Remove from heat
- In a large bowl, combine the Coco Pops with the melted Mars Bar mixture
- Stir until thoroughly combined
- Tip: The mixture sets quite quickly if you're in a cooler climate so it's best to do this with your bowl over simmering water so that the Mars Bar mixture stays warm, alternatively, melt the Mars Bars in a large pot which you can then add the Coco Pops to
- Press into your prepared dish
- Tip: I found it best to use a small piece of buttered parchment paper to spread and press the mixture
- Leave to set while you prepare the chocolate
- Melt the milk chocolate in a heat resistant bowl over simmering water
- Pour the chocolate over the Rice Krispies and tilt the dish a little in each direction so that the chocolate moves around and coats the top evenly or spread with a spatula
- Allow the chocolate to set
- Tip: If you want the coloured chocolate to sit on top of the milk chocolate, then allow to set until firm. If you want the coloured chocolate to sink a little bit into the milk chocolate so it's a bit more flush with the surface, then leave to set until it's completely cool but the consistency is like thick magma
- In a heat resistant bowl over simmering water, melt the white chocolate
- Tip: You can also melt it in a microwave but be careful not to burn the chocolate, do short bursts then stir inbetween until chocolate is melted
- Stir powdered or paste food colour into the melted white chocolate
- Tip: Make sure you don't use any water based colouring as the chocolate will seize
- Pour the tinted chocolate into a piping bag
- Tip: Or you can use a plastic Ziploc bag or similar with a small corner snipped off
- Pipe patterns or words onto the surface of the chocolate
- Allow to set completely
- Tip: If you chill it in the fridge, allow it to sit out at room temperature for 10-20mins before cutting
- Cut into squares or shapes with a sharp blade
- Tip: To do the hearts, I pushed a cookie cutter through the chocolate layer then used a sharp knife to cut through the Krispies layer using the cookie cutter as a guide
Rice Krispie and Strawberry Pop Treats recipe adapted from official Kellogg's Rice Krispies Site
Mars Bar Coco Pop Treats recipe adapted from RecipeZaar
Other Tips:
Keep treats stored in an airtight container at room temperature
Best eaten on the same day but will keep for 2 days
Can be frozen for up to 6 weeks
- To freeze, place in layers with parchment paper inbetween in an airtight container.
- To defrost, stand out at room temperature for 15-30mins or overnight in the fridge
P.S. Happy Valentine's Day :)